Connect Custom WebSocket Room via Unity Engine
What is GameDrive's Room?
GameDrive's room built on top of Colyseus 0.14.23. It's coming with Nodes and Components based game engine which allow you to use fimilar game client coding style to fully control the room states and events on backend. Also, you can call Custom Data, Virtual Goods and other gamedrive module apis inside the room cycle.
How to create a Room?
-
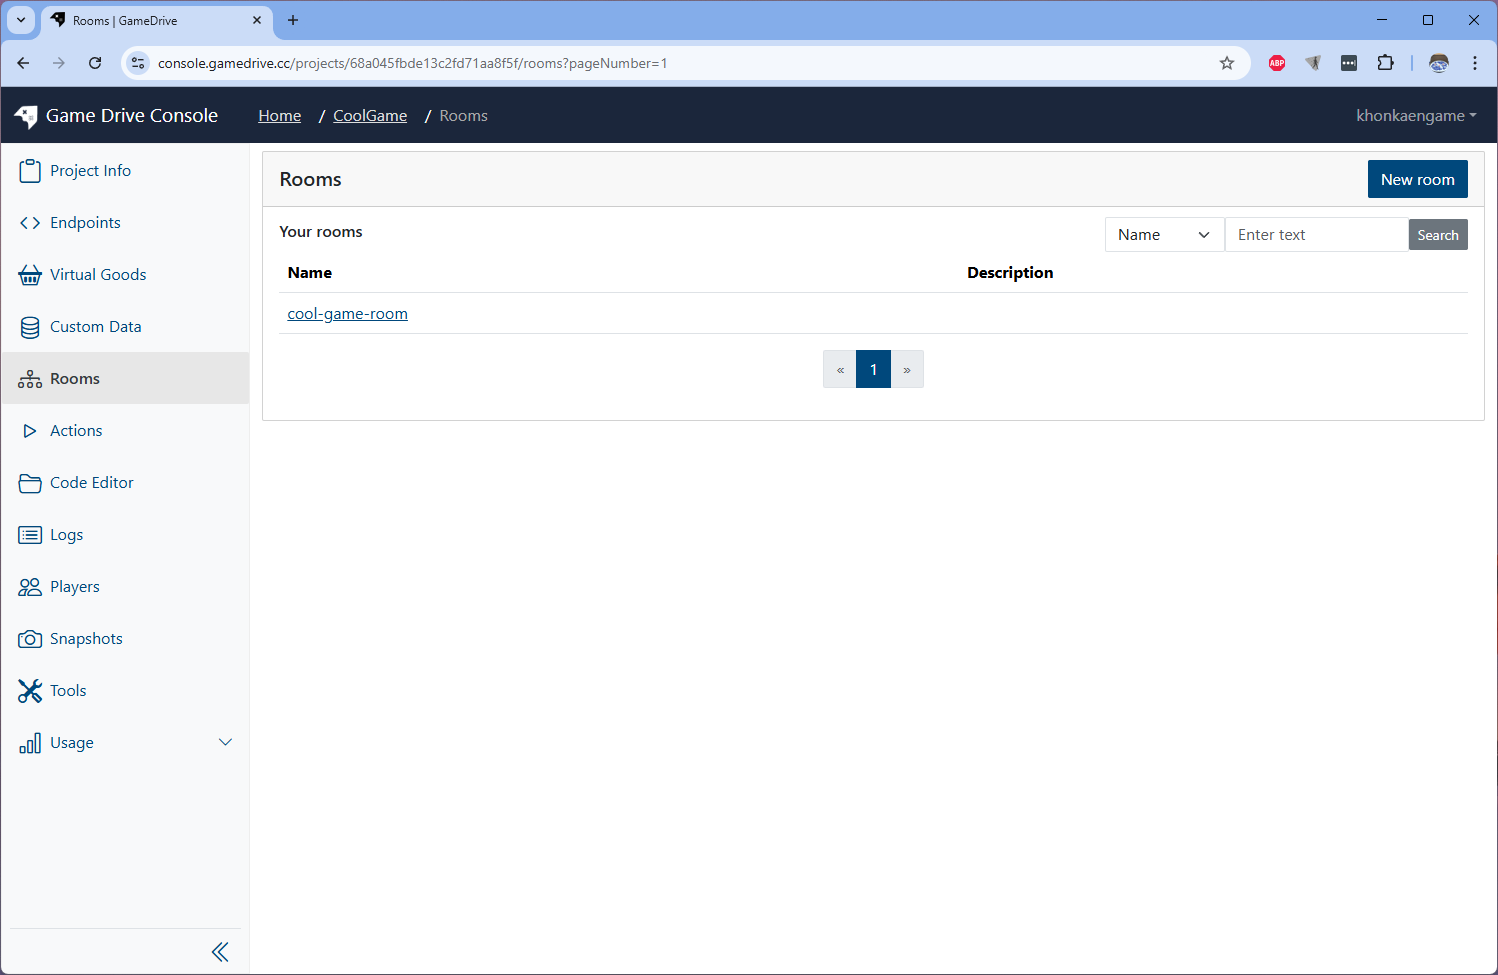
Go to Rooms menu on sidebar and click on New Room button on top righ

-
Input room name and click Create button

-
Input room name and click Create button
How to define the room's state?
Room's state is an object that will be sync to all clients connecting to the room. GameDrive's room state use .json file to define schema of room state. Tt base on Colyseus's room state definitions.
-
Go to the Room Detail page of the created room and click on Open in Code Editor link.
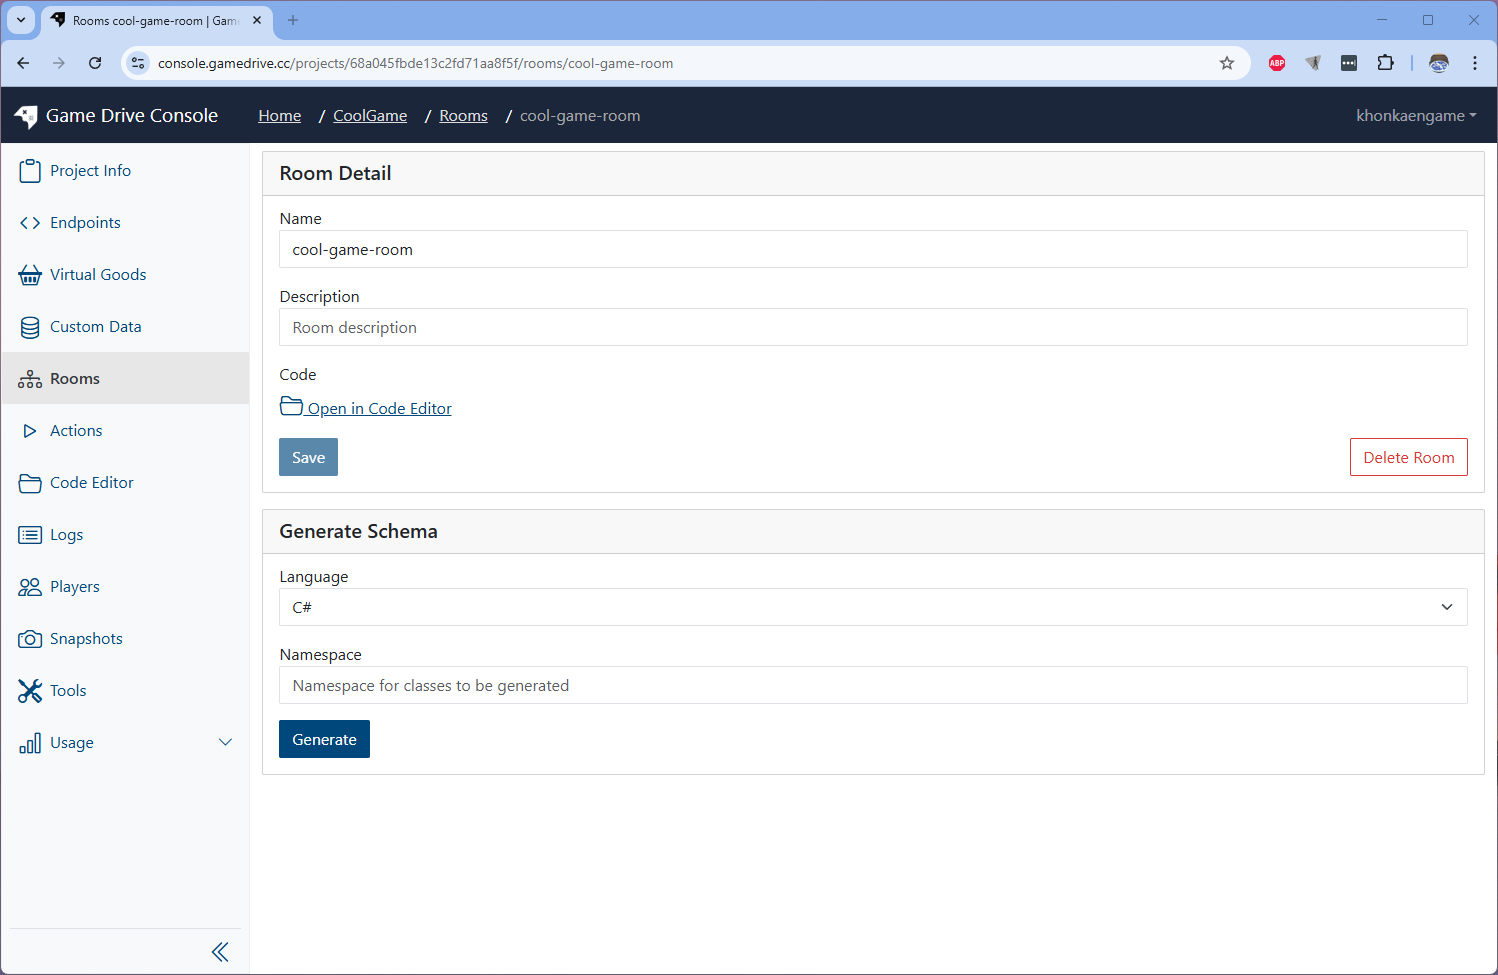
This will take you to the room's code editor.
-
Open up
rooms/cool-game-room/schemas/DefaultMainState.jsonfile and you will see the MainState schema definition contain default schema like this.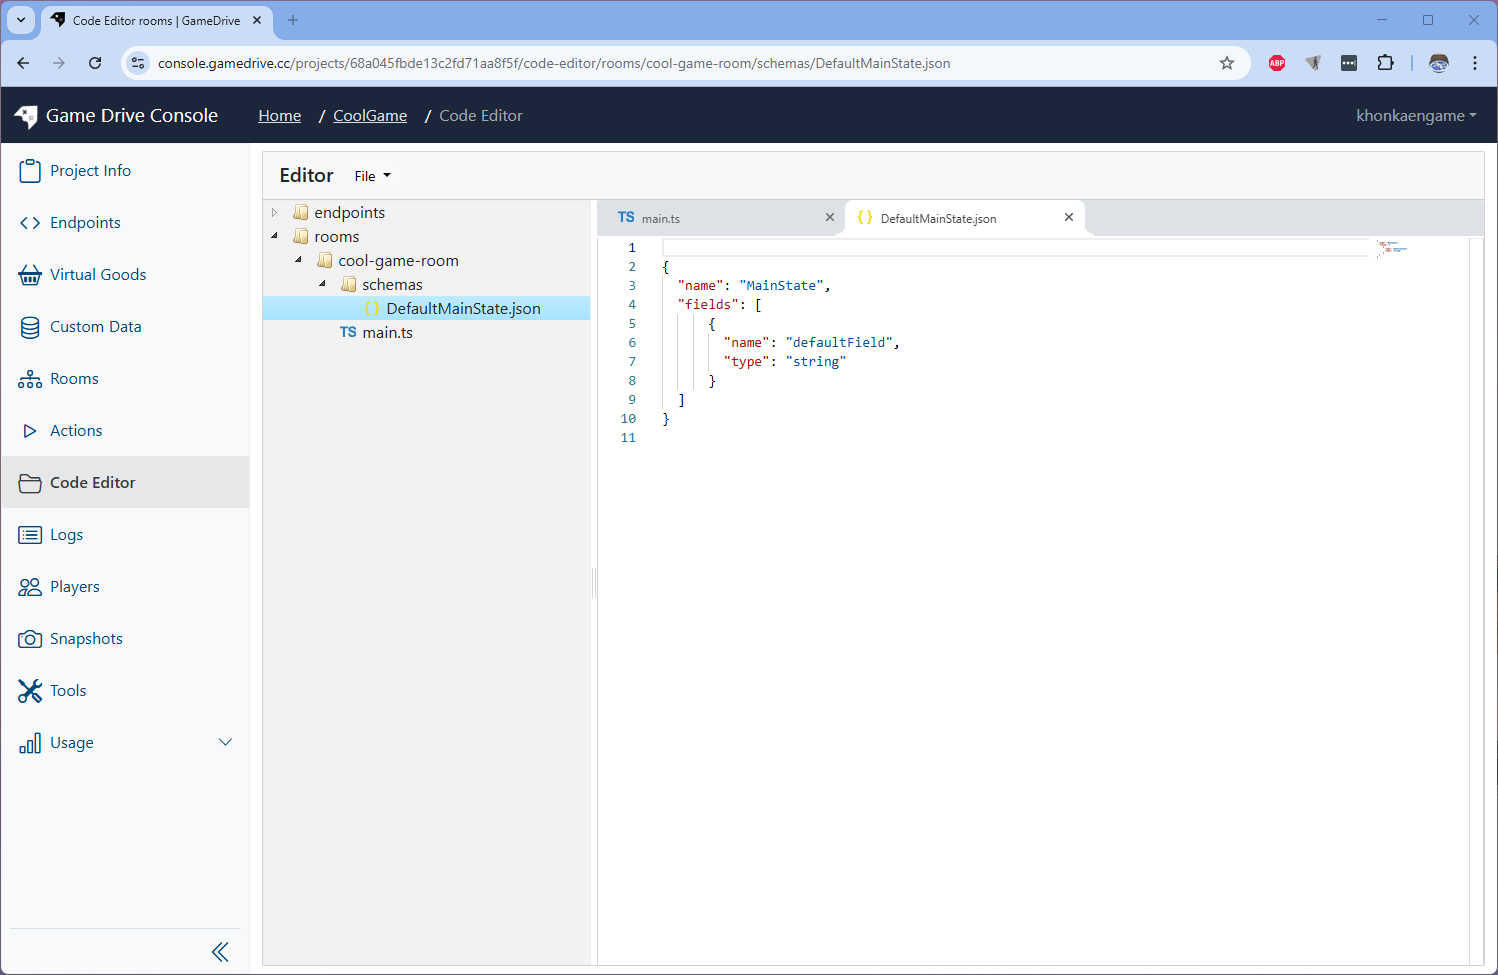
{
  "name": "MainState",
  "fields": [
    {
      "name": "defaultField",
      "type": "string"
    }
  ]
}
Edit the
rooms/cool-game-room/schemas/DefaultMainState.jsoncontent to this{
"name": "MainState",
"fields": [
{
"name": "timer",
"type": "float32"
},
{
"name": "players",
"type": "Player",
"collection": "ArraySchema"
},
{
"name": "itemMap",
"type": "Item",
"collection": "MapSchema"
}
]
}And create 2 more schema files
Create
rooms/cool-game-room/schemas/Player.jsoncontent to this{
"name": "Player",
"fields": [
{
"name": "id",
"type": "string"
},
{
"name": "name",
"type": "string"
},
{
"name": "positionX",
"type": "int8"
},
{
"name": "positionY",
"type": "int8"
},
{
"name": "connected",
"type": "boolean",
"default": true
}
]
}Create
rooms/cool-game-room/schemas/Item.jsoncontent to this{
"name": "Item",
"fields": [
{
"name": "name",
"type": "string"
},
{
"name": "level",
"type": "uint8"
}
]
}The result should look like this
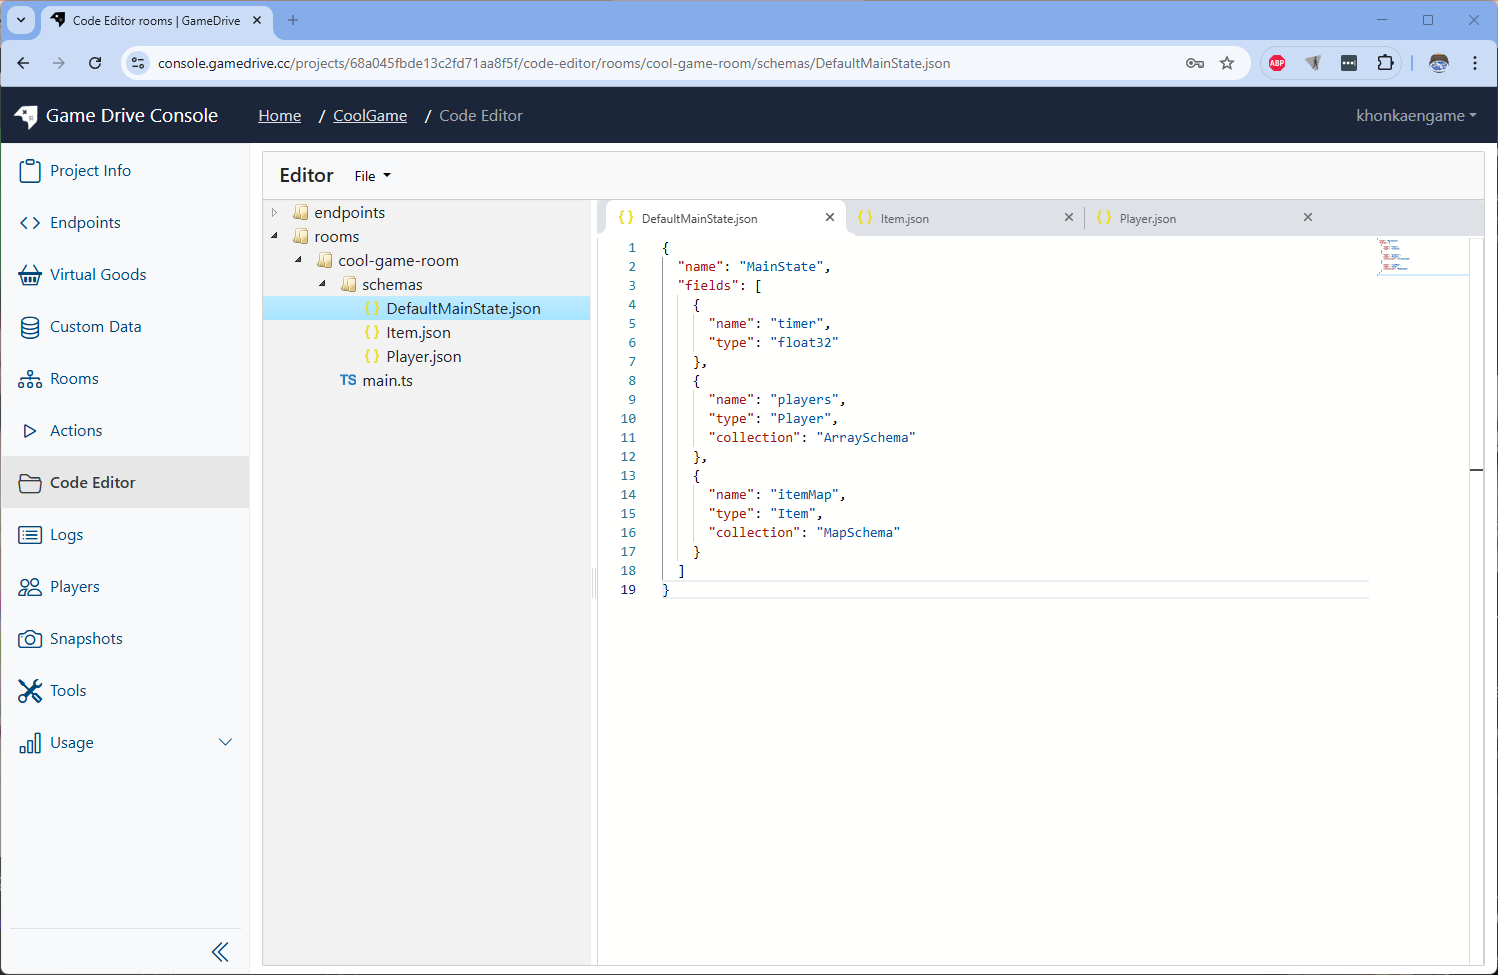
As you can see, the MainState contains 3 fields.
- timer, as a float
- players as an array
- items as a map
Now schema of the room is ready to use.
Generate C# state's schema classes to use in Unity's sdk
On previous step, we defined 3 schema files. We will convert those schema into C# schema classes.
Go to cool-game-room detail page.
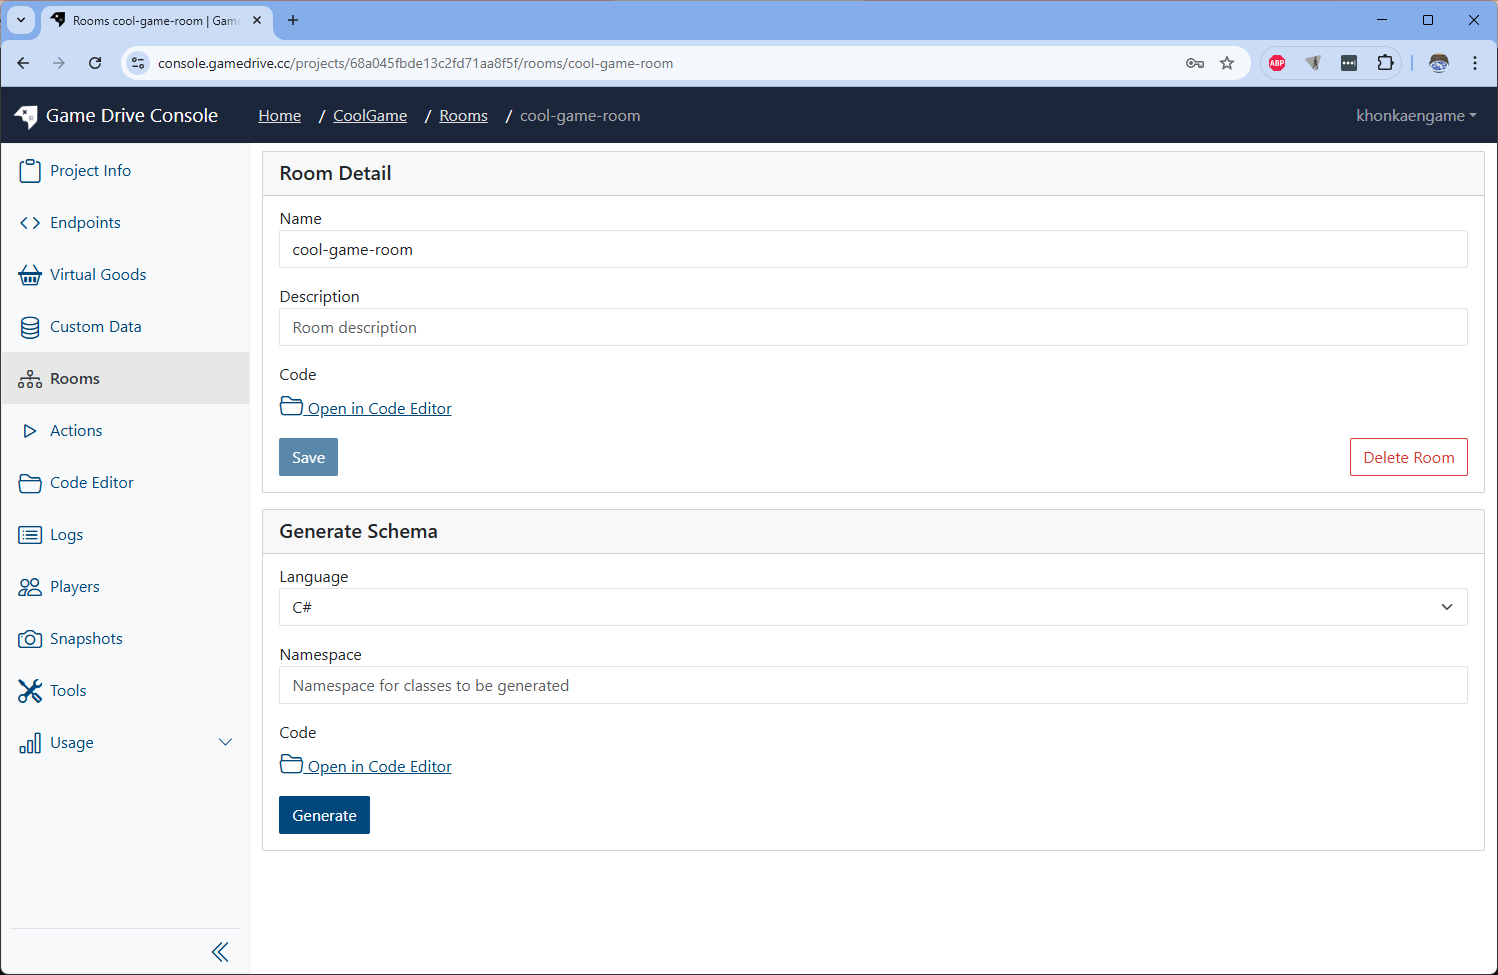
Then click on 'Generate' Button.
After finish load it will show 'Open In Code Editor' link. Click on it and it will bring you to the C# scripts result
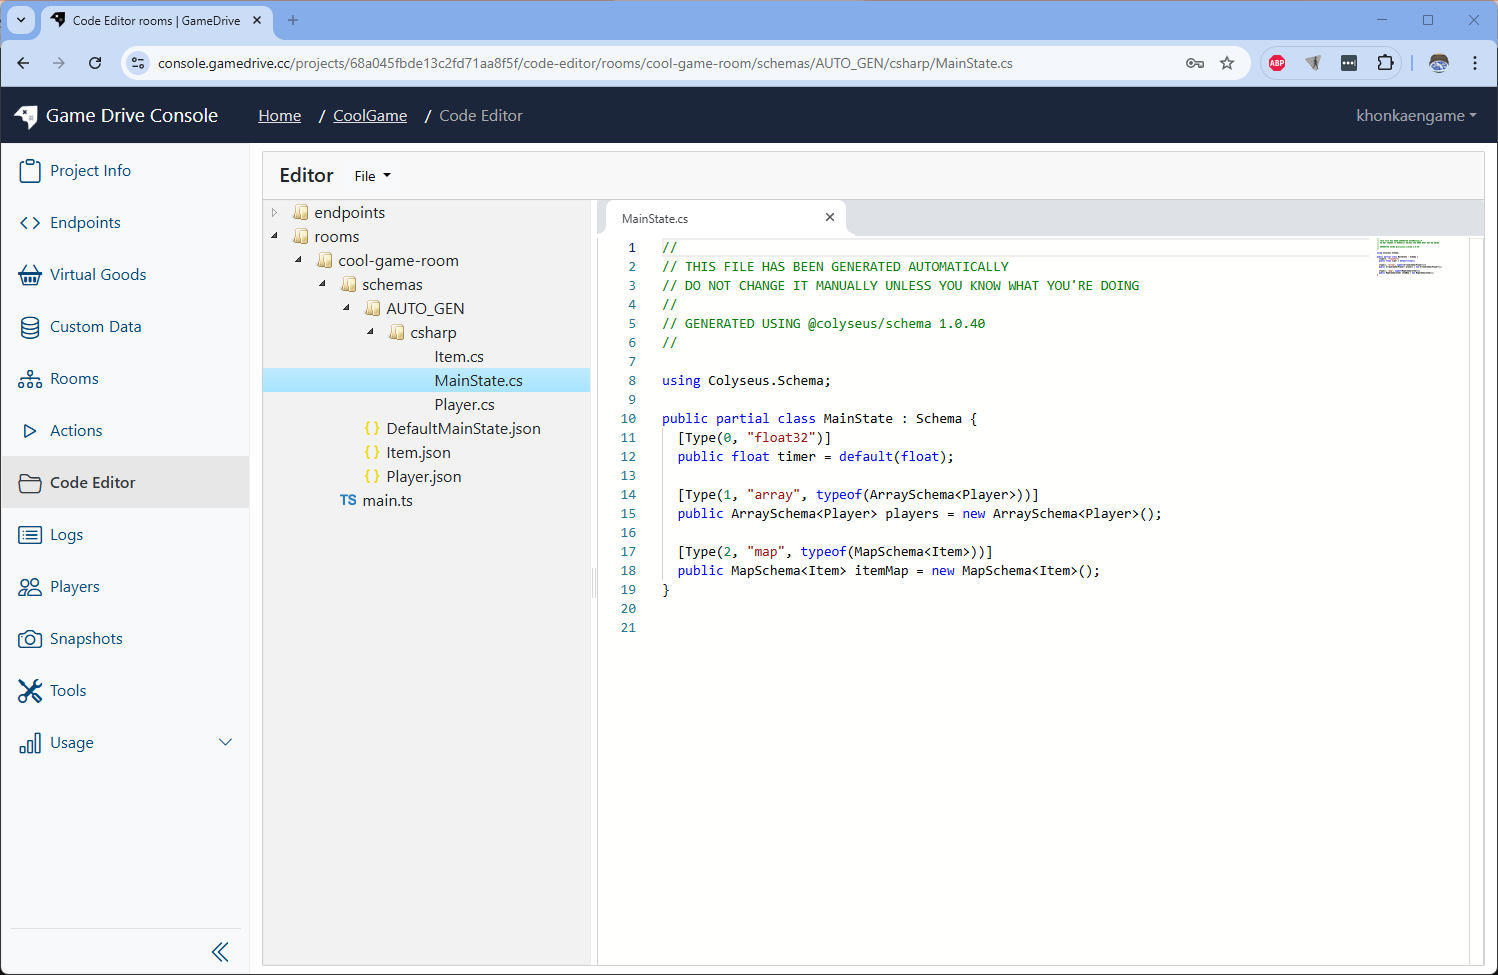
Now we have C# schema classes to use on Unity engine sdk on next steps.
How to handle room events and state?
Handling events and state of rooms is complicated and hard show the components file by file here. So let's use GameDrive's import feature to import the pre-made project that contain the handling logic.
Download sample exported project.json file
📥 DownloadImport the file to the existing project.
Go to Tools tab in sidebar menu
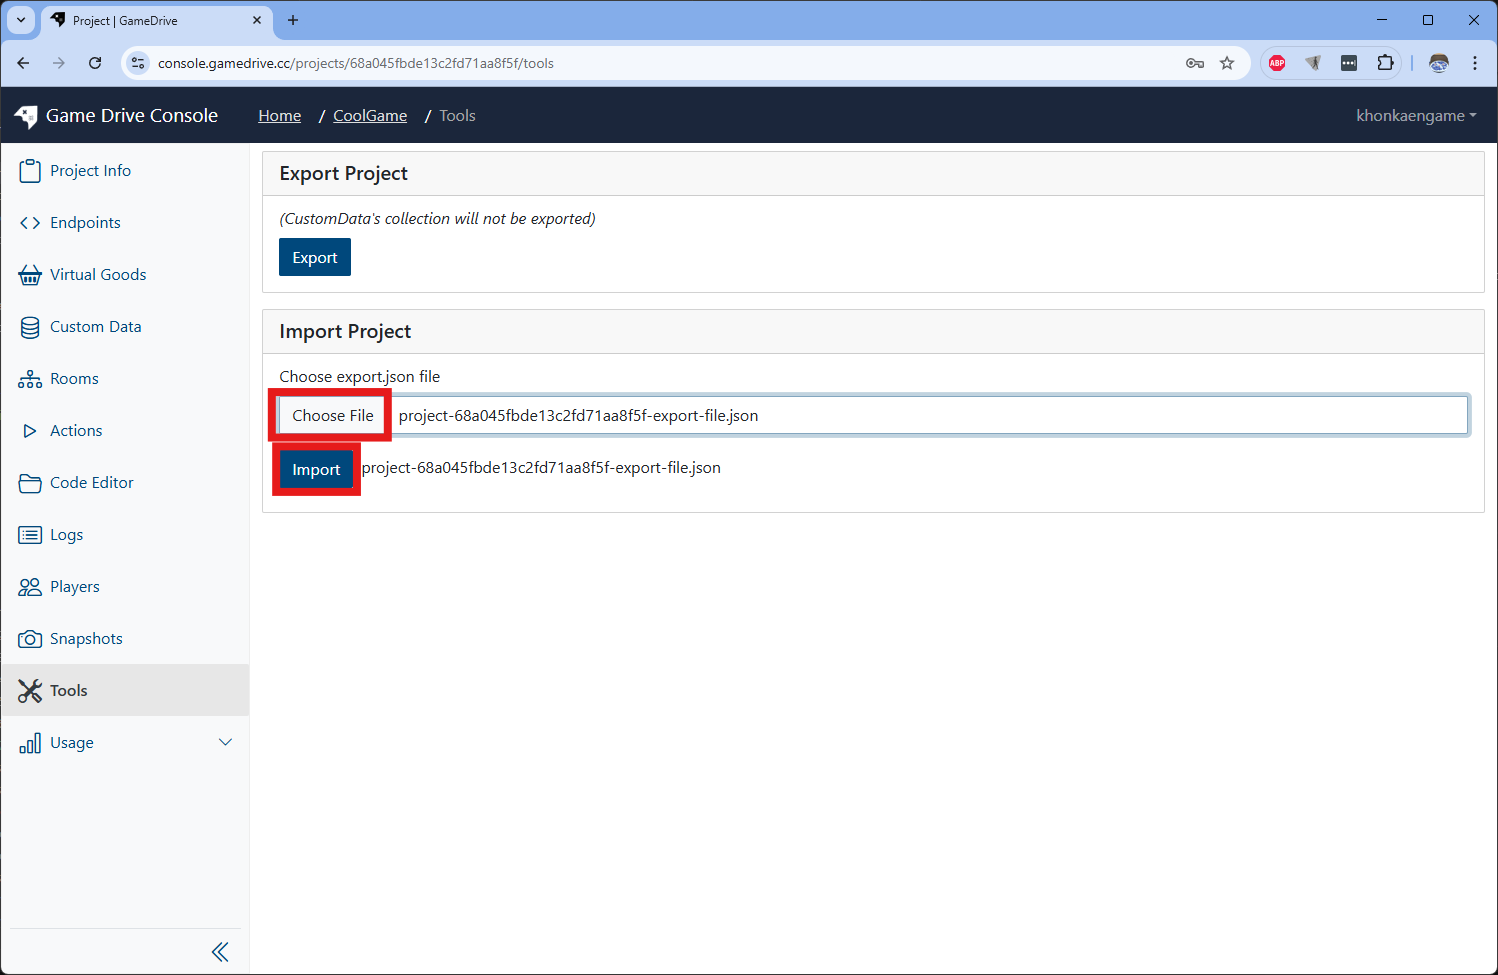
Click on Choose file button, select the file then click Import button.
Check the imported rooms components.
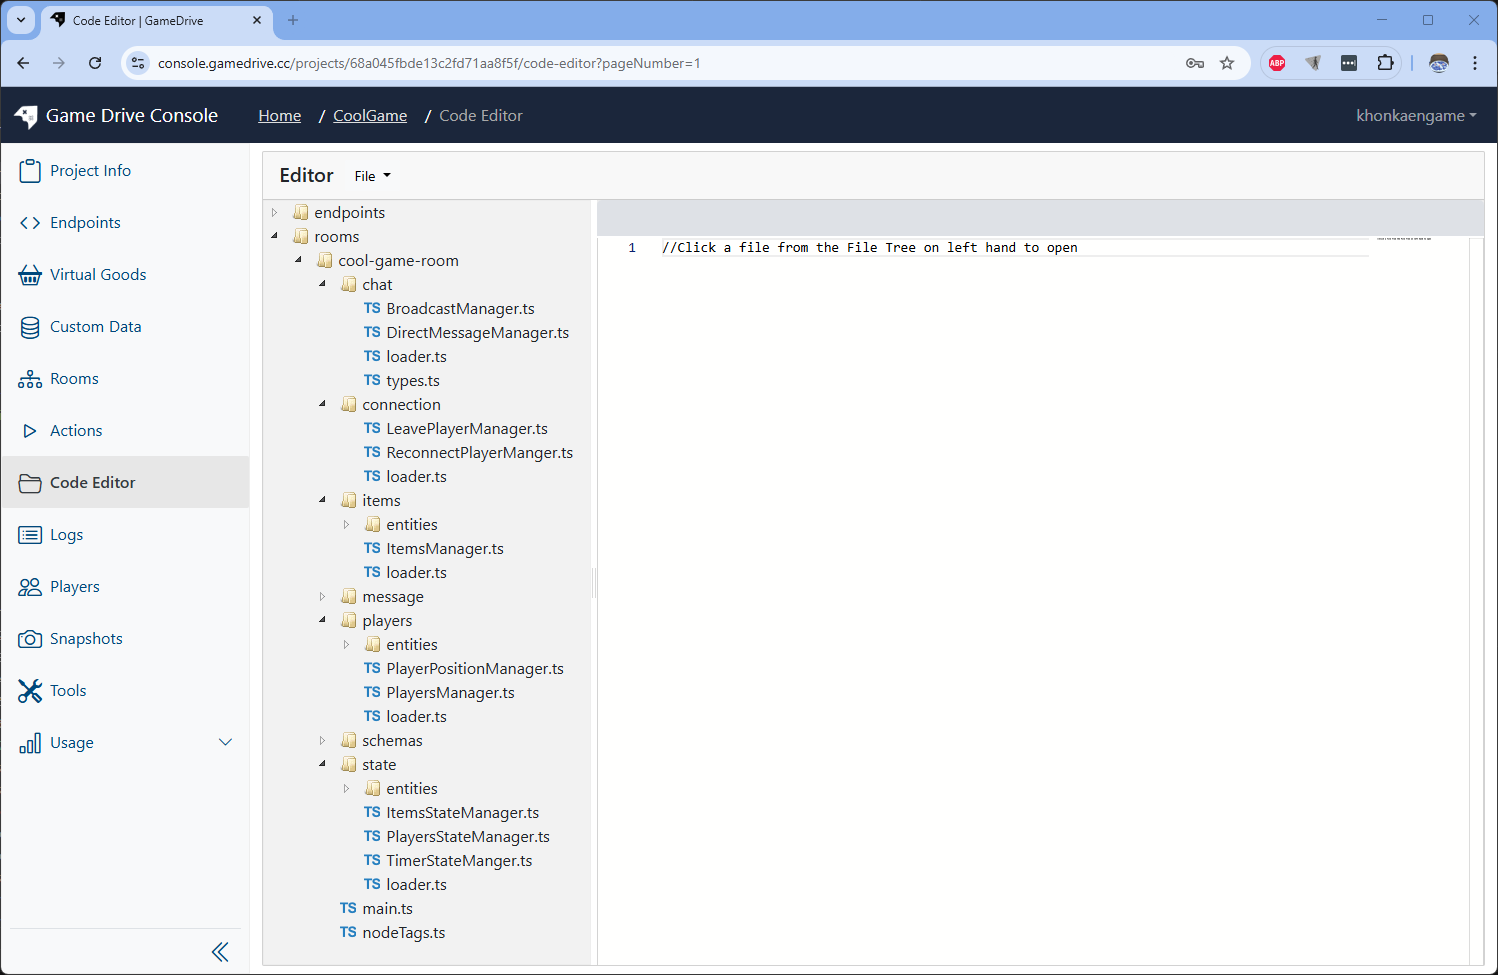
It contains following systems
- chat
- connection
- items
- message
- players
- state
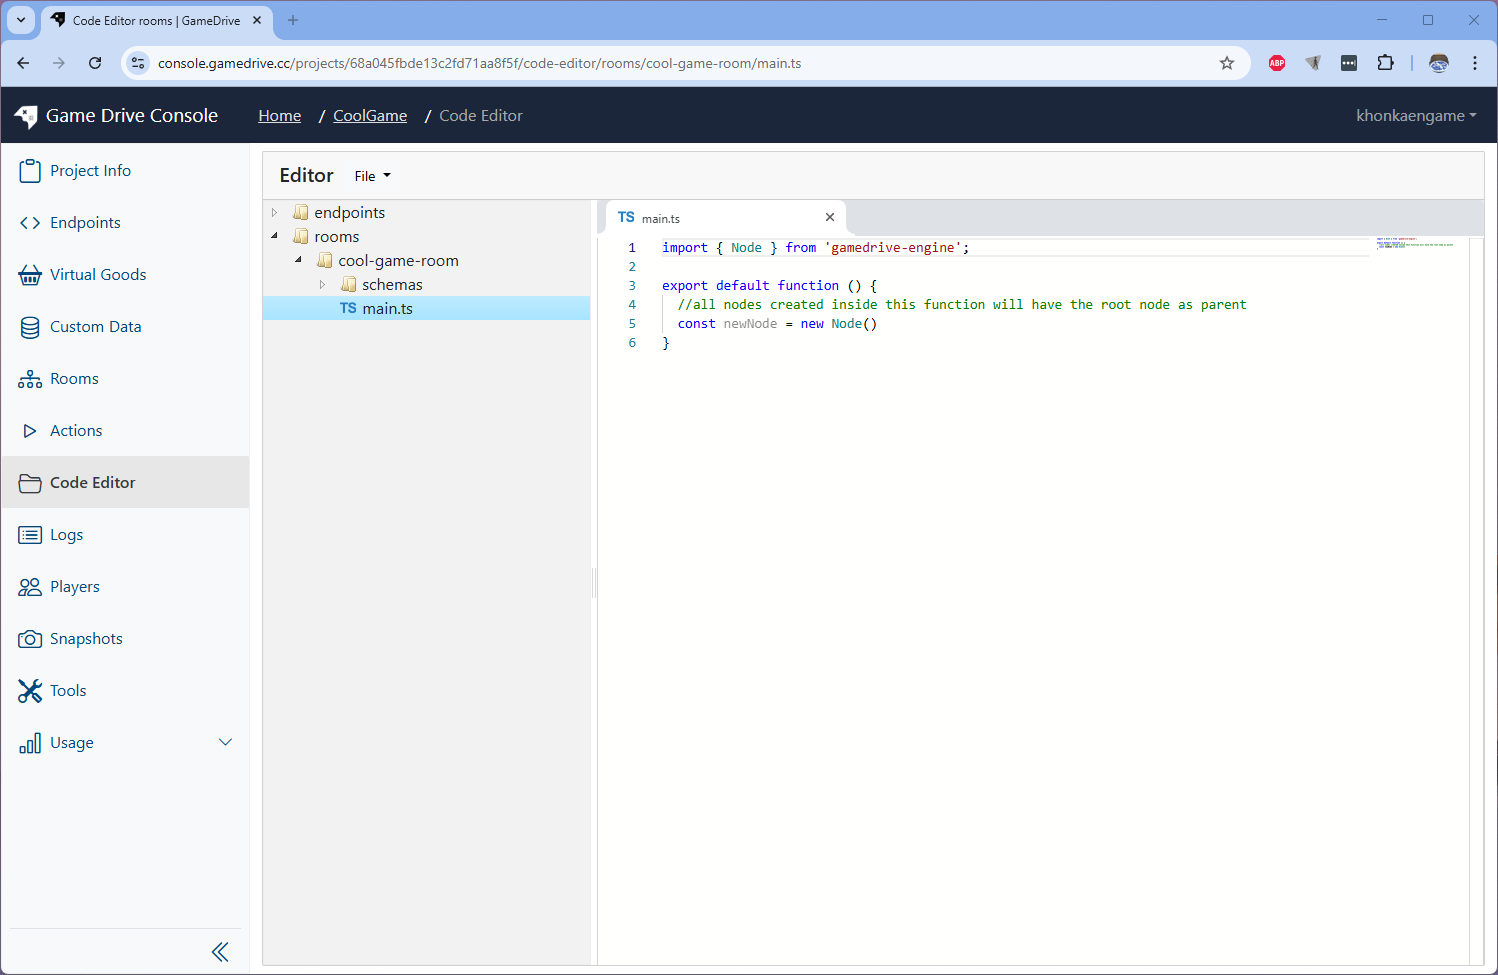
To start explore the components, start with rooms/cool-game-room/main.ts file. This file is the entrypoint of the room which will load other manager components.
Create new snapshot
After imported, it's good to create new snapshot to avoid losing changes. And if you want to test the room on LIVE stage in next topic, do not forget to ppublish the snapshot to live.
How to connect to the room via Unity Engine?
Install GameDrive's Unity SDK.
Check previous topic to see how.
Open room sameple scene.
Open scene at Assets/Scenes/GameDriveSampleRoomScene. This scene allow us to use 3 clients to create room, join the room, sync the same state object msend and receive message to each other.
At first, check the file Assets/Domains/Room/Clients/MainState.cs. This file contain generated classes from generate C# state classes.
Login and Join room.
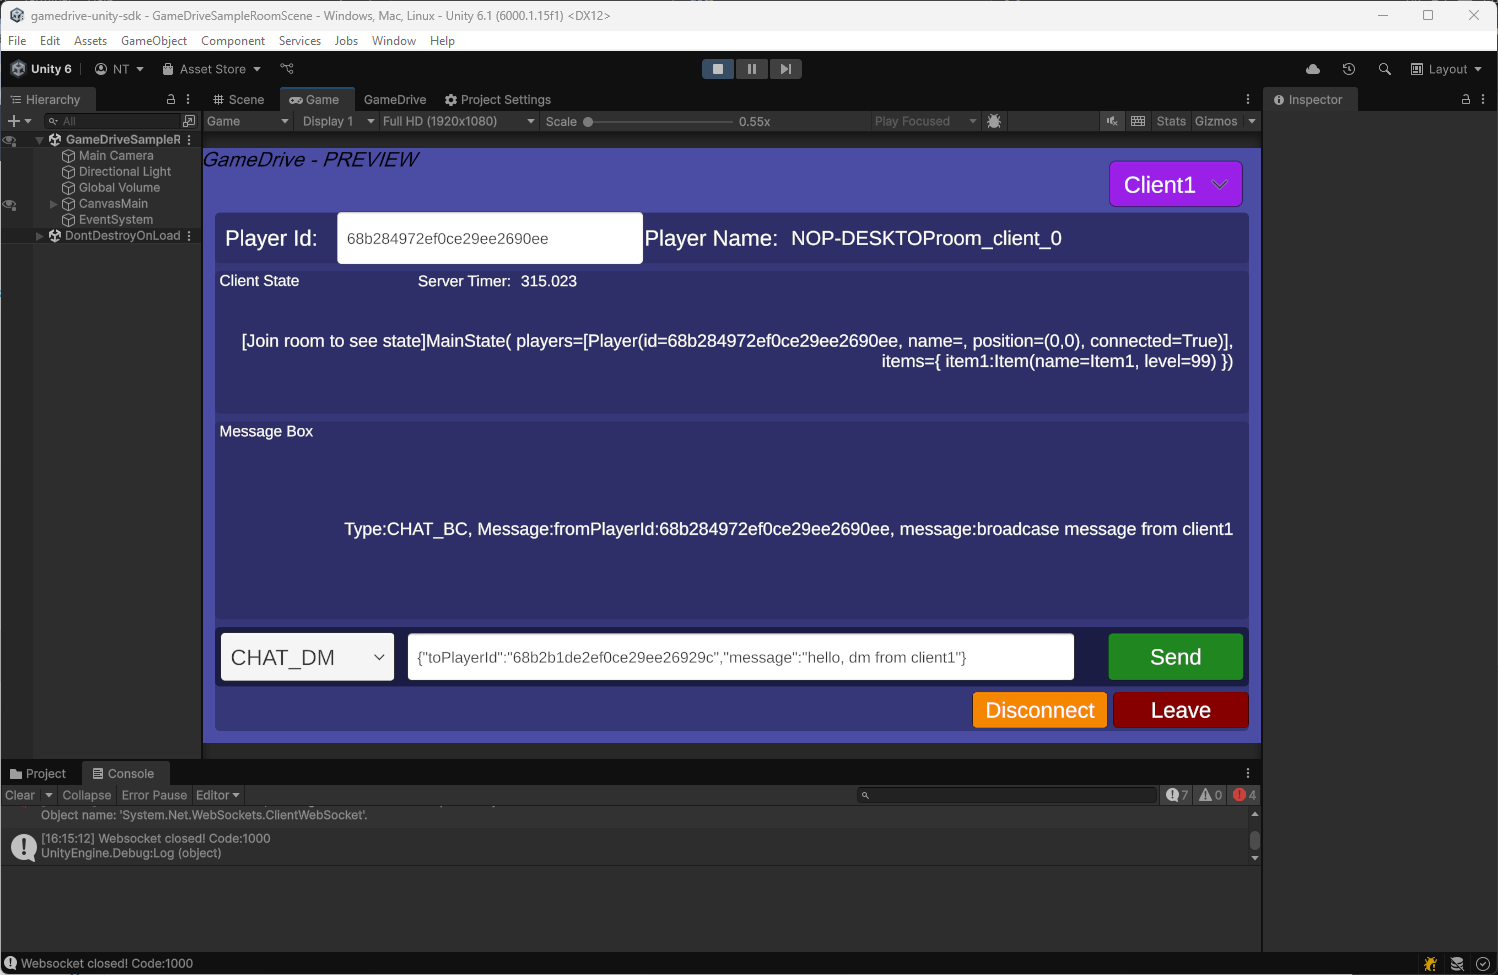
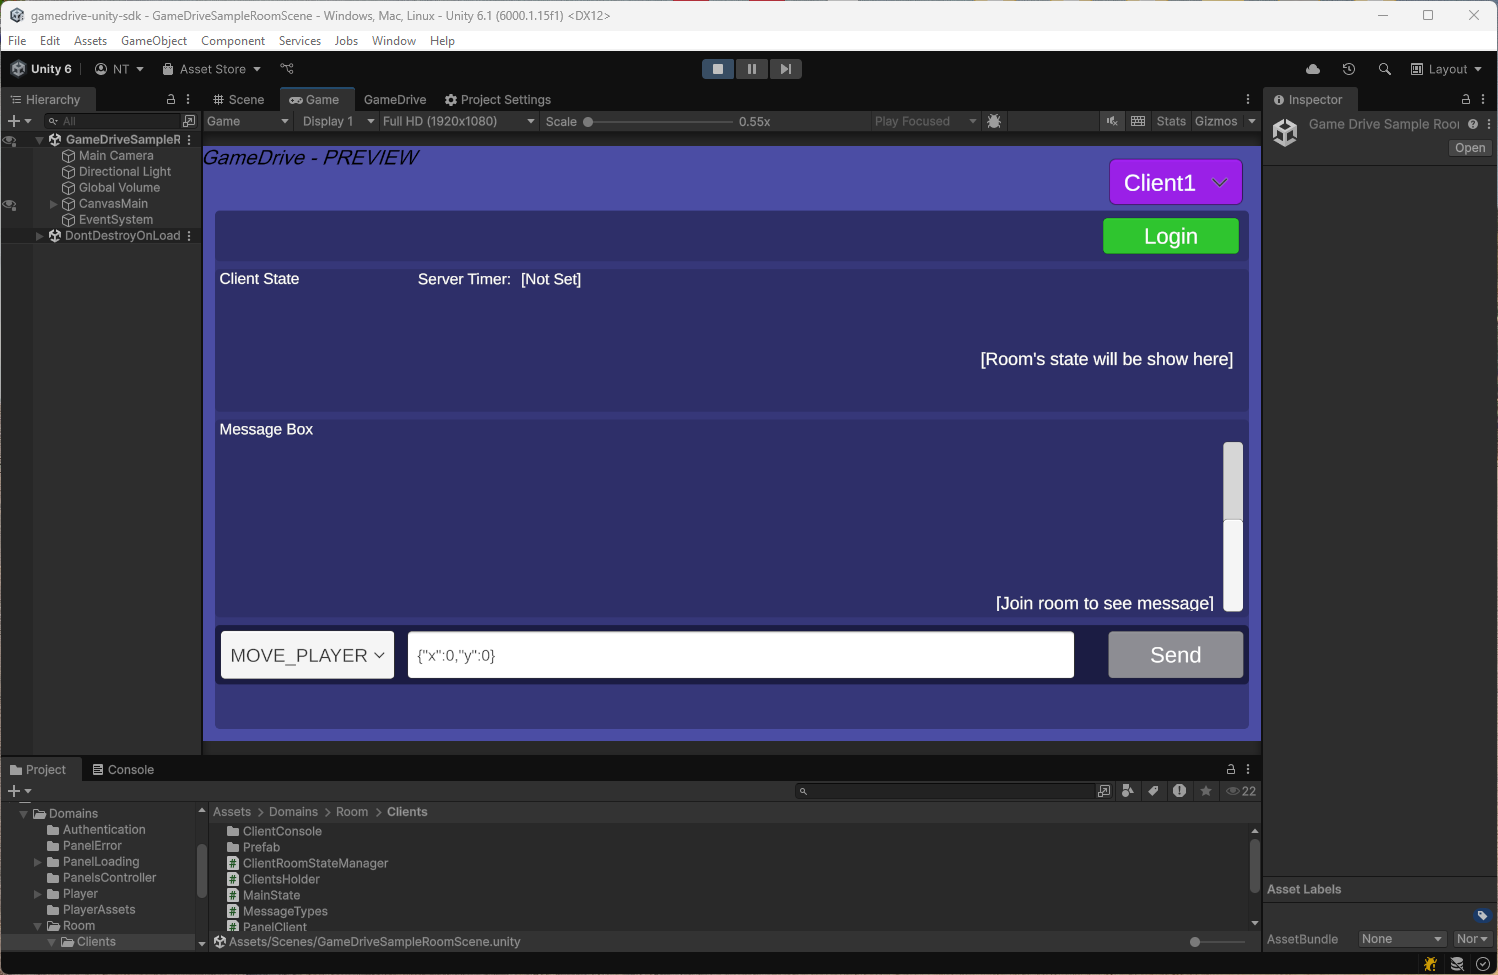
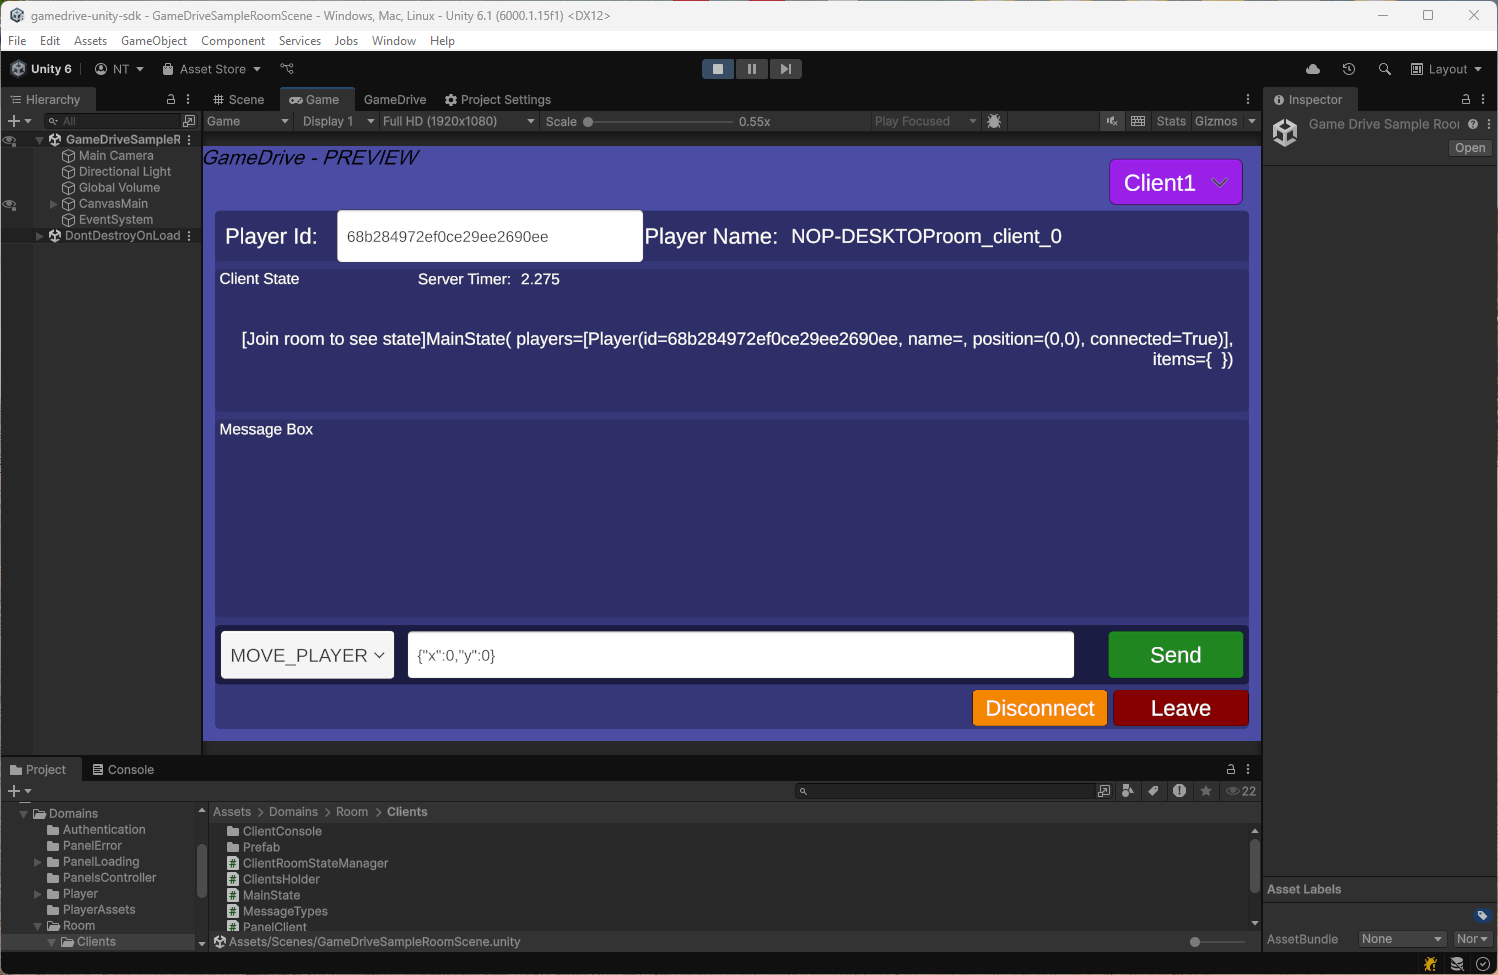
Press Play to run the scene. we will see welcome UI. Press 'Start 3 Clients Room' button and it switch to Client Console ui.

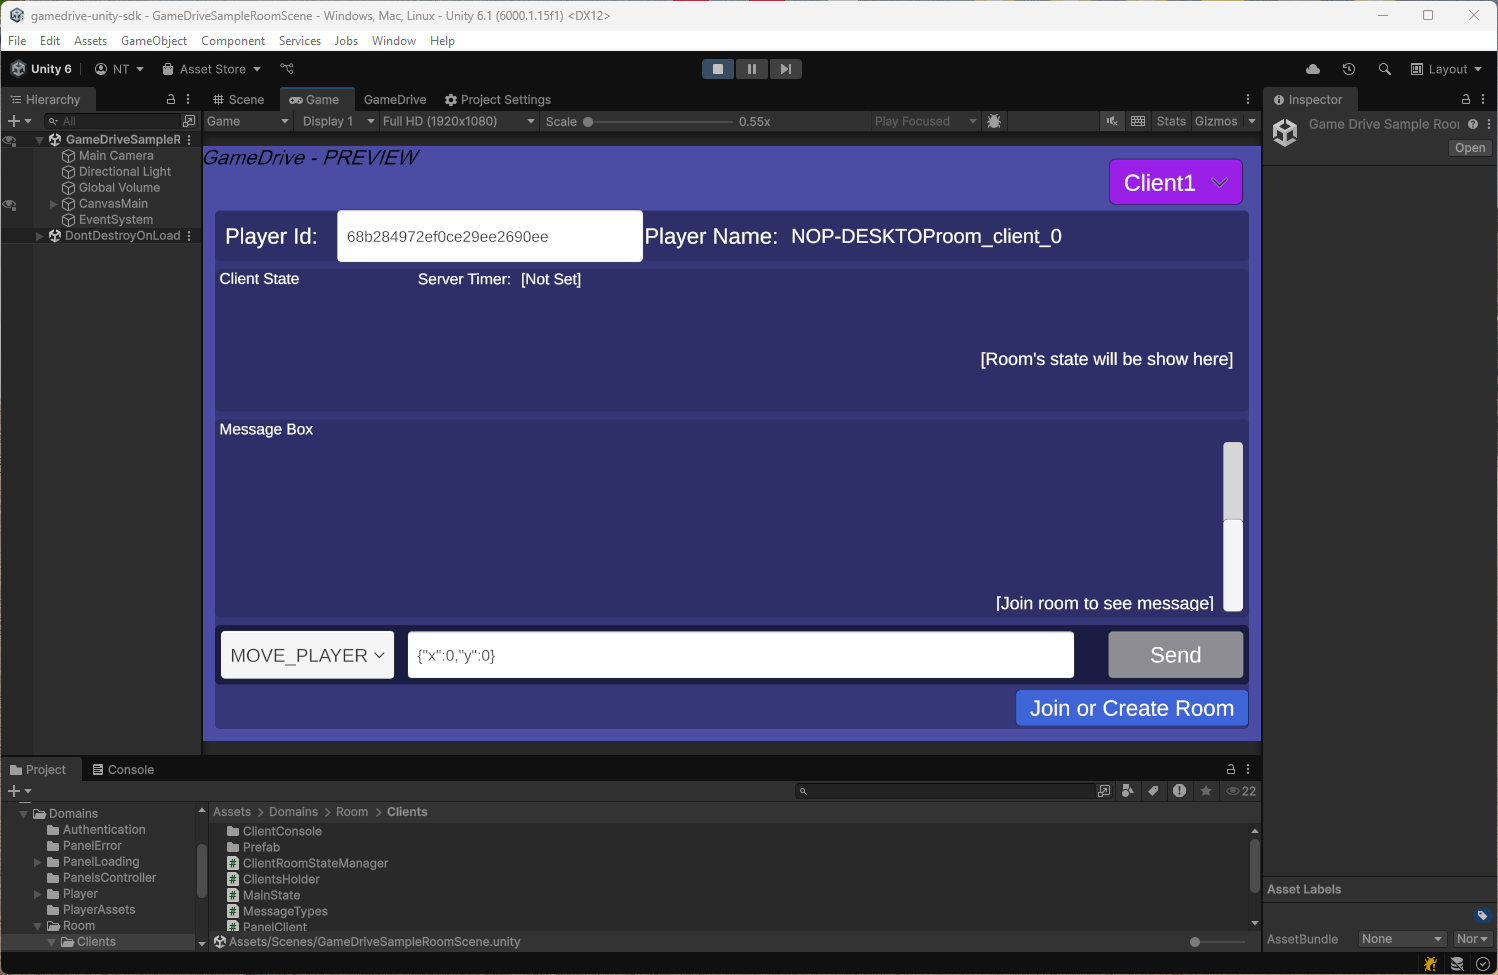
Press 'Login' button for Client1.
then press 'Join Or Create Room' button
Here is C# code example to join or create a room
var roomClient = new RoomClient<MainState>("cool-game-room", Client);

//define room options
var options = new Dictionary<string, object>();
roomClient.JoinOrCreate(options, (colyseusRoom) =>
{
    //hadle join room success
}, (error) =>
{
  //handle error
});
Then we will see the state of room showing up.
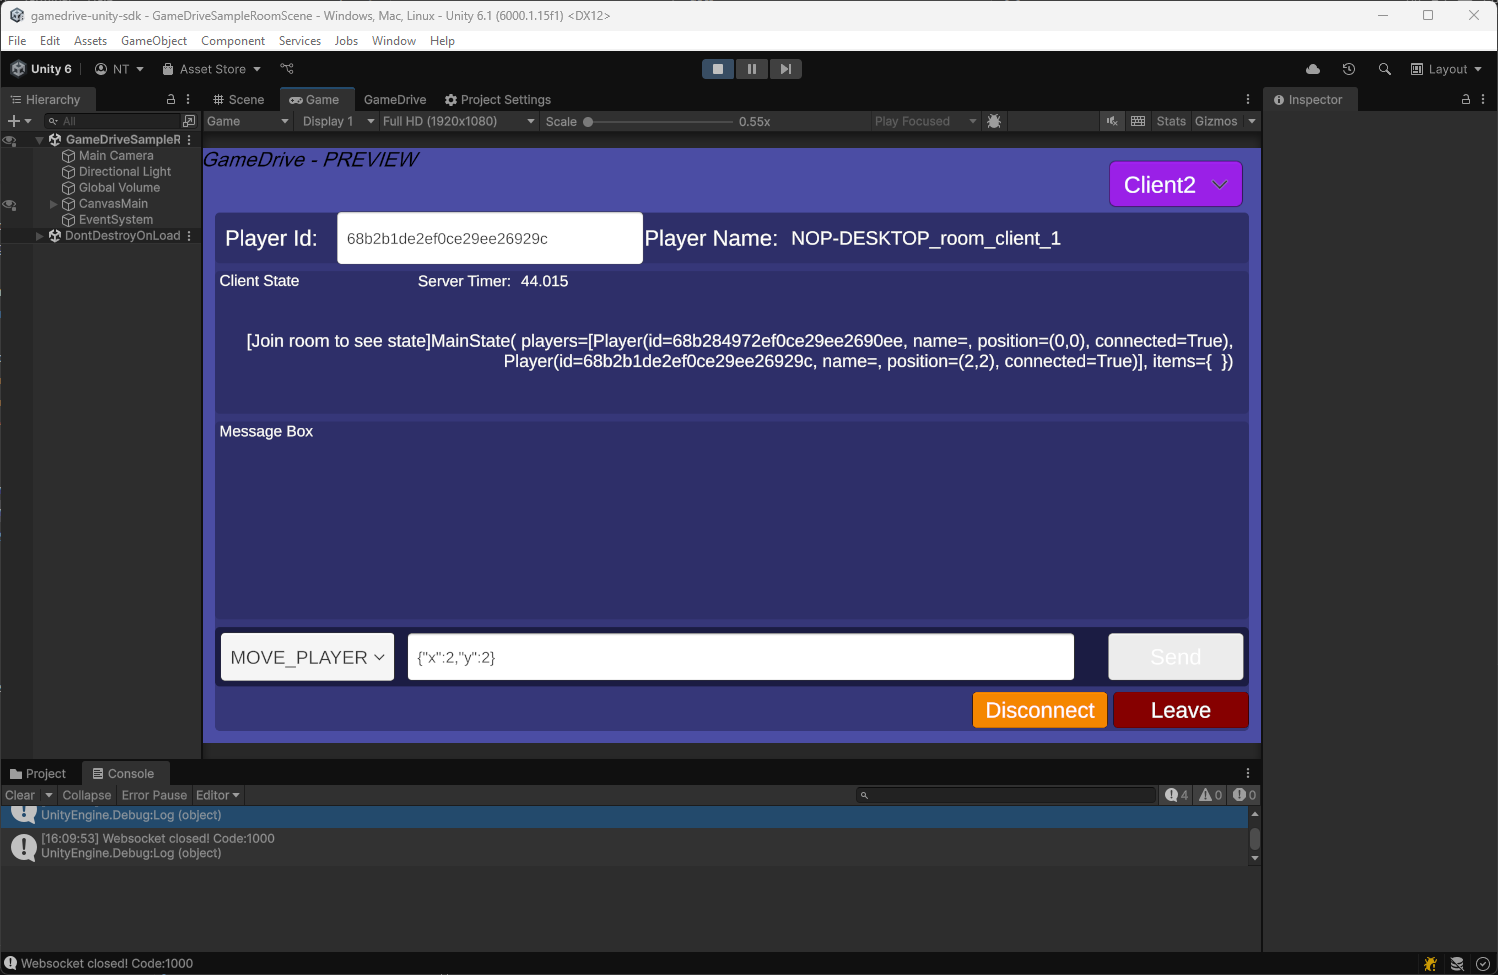
Switch to Client2 by top right dropdown.
Then press 'Login' button then press 'Join Or Create Room' button. We will see the state section panel having 2 players on both Client1 and Client2 ui console.

We can do login and join room for the Client3 aswell but in this page we will use only 2 clients.
This is how we handle state when new client join the room on backend.
Receive on join event by this code.
 onJoinListener(client: Client, options: any) {
    const playerId = client.userData.playerId
    const player = this.playersStateManager.getPlayerById(playerId)
    if (!player) {
      this.playersStateManager.addNewPlayer(playerId, 0, 0, true)
    } else {
      console.error("player already exist")
    }
  }
Then add new player to room state by this code.
  public addNewPlayer(playerId: string, positionX: number, positionY: number, connected: boolean): PlayerSchema {
    const PlayerSchemaClass = schemaManager.getClass('Player')
    const newPlayer = new PlayerSchemaClass()
    newPlayer.id = playerId
    newPlayer.positionX = positionX;
    newPlayer.positionY = positionY;
    newPlayer.connected = connected;
    state.players.push(newPlayer)
    return newPlayer
  }
Send message from cleint to manage room state.
Client2 send move message and state of player position update
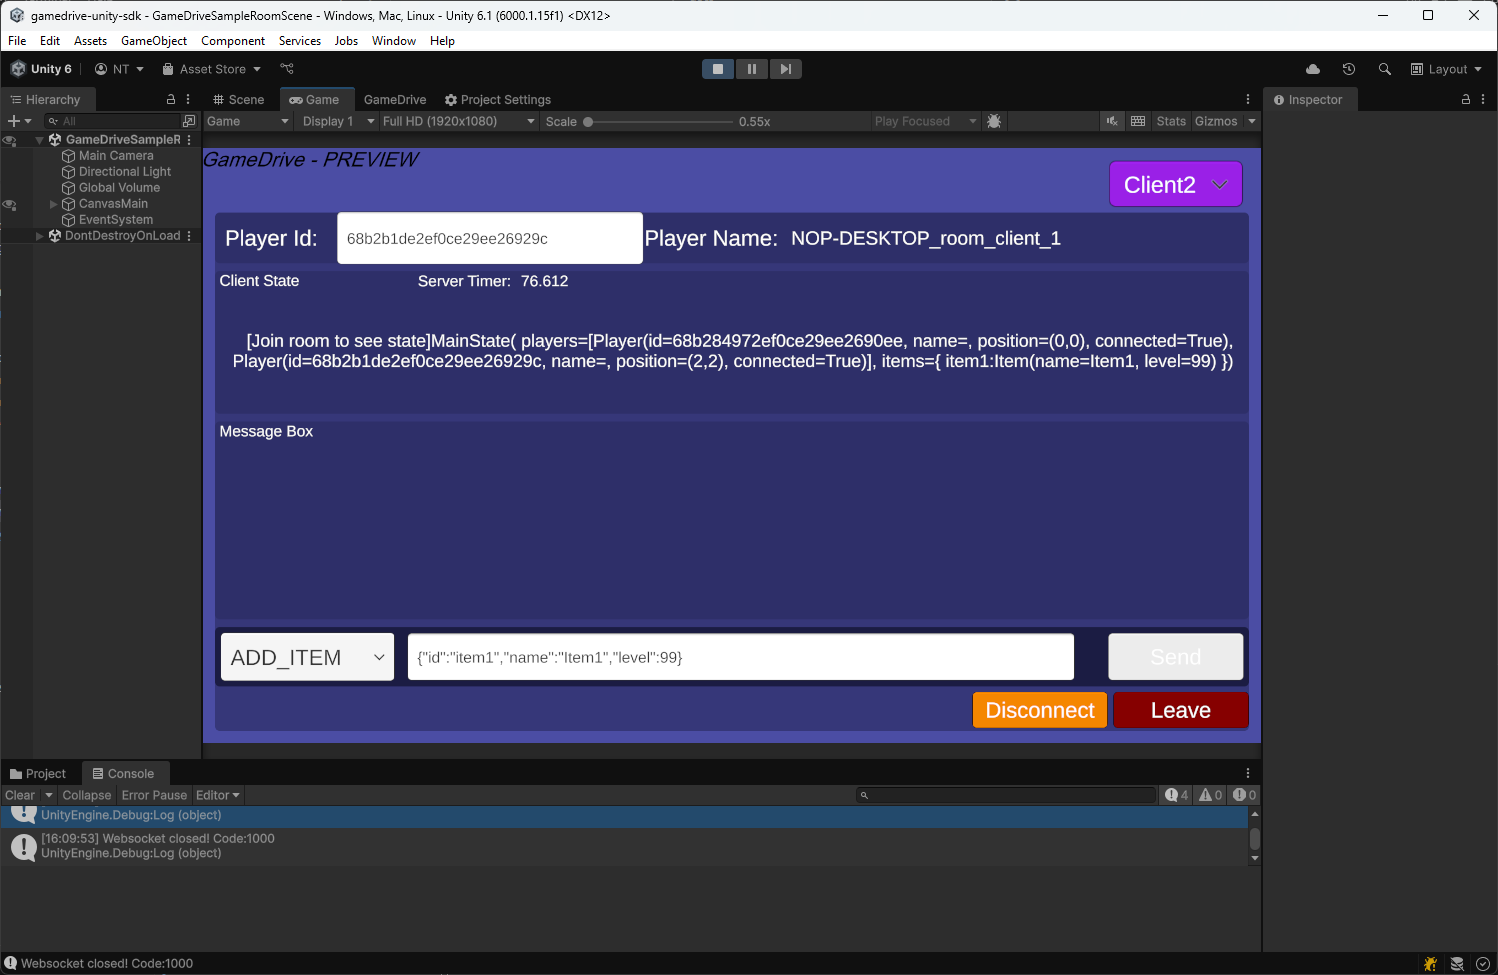
Client2 send add item message and state of item update
Switch back to Client1 and we will see all state is sync to the same value of Client2's state

This code show example of send message from client
  public class MovePlayerMessage
  {
      public int x;
      public int y;
  }

  public void SendMovePlayerMessage(){
    try
    {
        //Define message type
        string messageType = "MOVE_PLAYER";

        var messageObj = new MovePlayerMessage();
        messageObj.x = 2
        messageObj.y = 2
        await colyseusRoom.Send(messageType, messageObj);
    }
    catch (System.Exception err)
    {
        Debug.LogError(err.ToString());
    }
  }
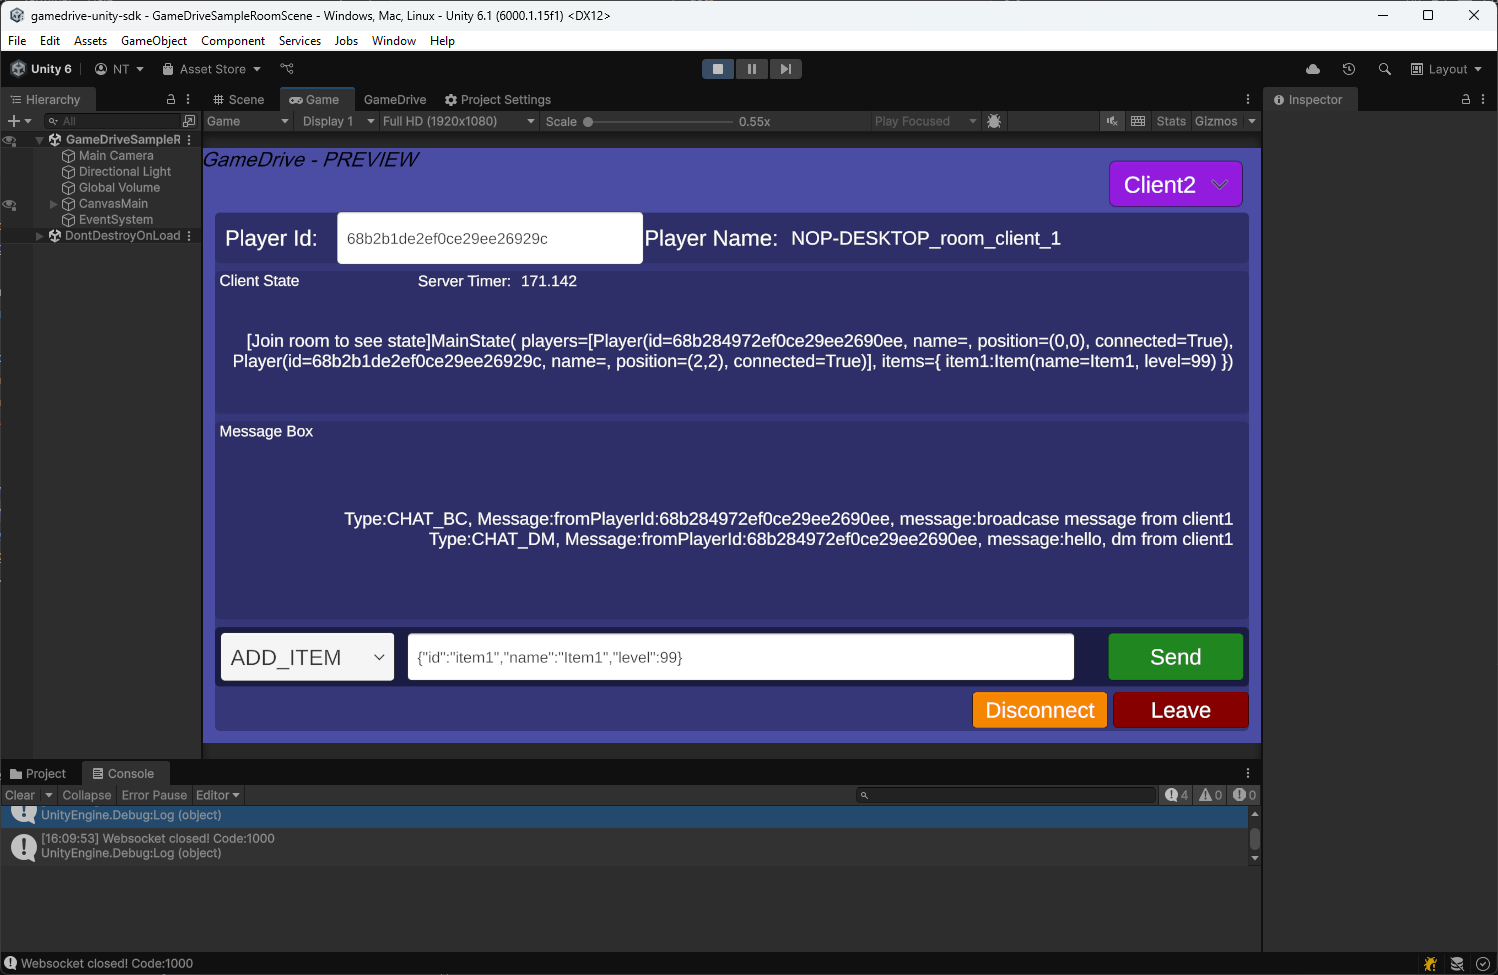
Send chat message between clients.
Client 1 send broadcase message to all clients

Client 1 send direct message to client2. We use playerId of the Client2 as parameter in message body.

Client2 will receive all messages from Cleint1
This code show how to handle message from backend side.
How to receive and send Broadcast messages
export class BroadcastManager extends Component {
  onEnable() {
    onMessageEmitter.on(MESSAGE_CHAT_BC, this.receiveMessage, this);
  }

  onDisable() {
    onMessageEmitter.off(MESSAGE_CHAT_BC, this.receiveMessage);
  }

  private receiveMessage(client: Client, message: string) {
    this.sendBroadcase(client.userData.playerId, message);
  }

  private sendBroadcase(fromPlayerId: string, message: string) {
    const messageObj: MessageObj = {
      fromPlayerId: fromPlayerId,
      message: message,
    };
    broadcast(MESSAGE_CHAT_BC, messageObj);
  }
}
How to receive and send DM message
type ChatDM = {
  toPlayerId: string;
  message: string;
};
export class DirectMessageManager extends Component {
  onEnable() {
    onMessageEmitter.on(MESSAGE_CHAT_DM, this.receiveMessage, this);
  }

  onDisable() {
    onMessageEmitter.off(MESSAGE_CHAT_DM, this.receiveMessage);
  }

  private receiveMessage(client: Client, message: ChatDM) {
    this.sendMessageTo(
      client.userData.playerId,
      message.toPlayerId,
      message.message
    );
  }

  private sendMessageTo(
    fromPlayerId: string,
    toPlayerId: string,
    message: string
  ) {
    const client = clientManager.getClientByPlayerId(toPlayerId);
    if (!client) {
      return;
    }
    const messageObj: MessageObj = {
      fromPlayerId: fromPlayerId,
      message: message,
    };
    client.send(MESSAGE_CHAT_DM, messageObj);
  }
}
Disconnect, reconnect and leave room.
Press 'Disconnect' button on Client2 and switch to see Client1, you will see connected value of player2 = False

But if press 'Leave' button on Client2, Client1 will not see state of Player2 in the player array anymore